
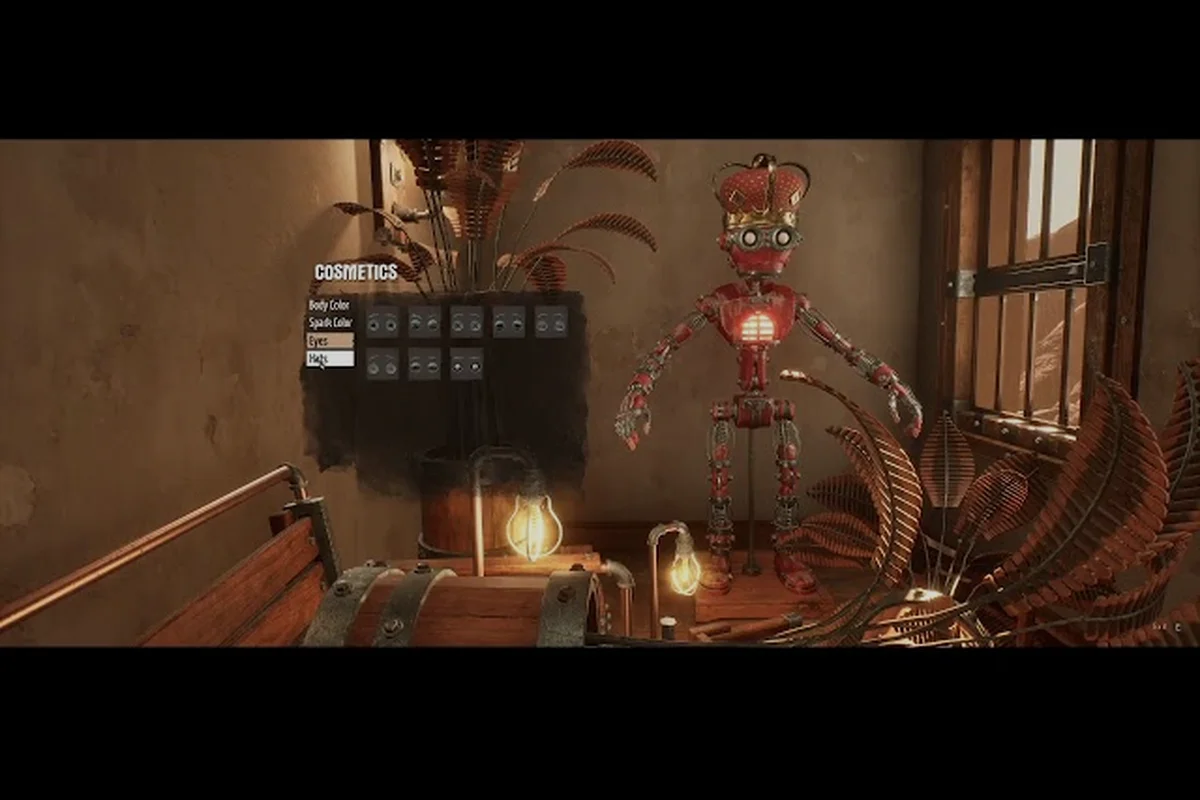
Surviving the scorched wasteland in GRAIN ROT demands more than quick reflexes — it demands smart investment. Knowing the grain rot best upgrades transforms your Outpost from a crumbling shelter into a launchpad for deeper, more profitable runs. Because every scrap of salvage matters, prioritizing the right stat upgrades and furniture pieces determines whether you extract with riches or become another victim of the Corrupted.
The game, released August 7, 2026 on Steam by Swedish duo Beck & Branch Games, blends co-op extraction with base building. You descend into shifting ruins, rip out furniture, and scavenge loot before the Corrupted close in. What you bring back rebuilds the Outpost, and what you rebuild directly improves your survival odds. This guide breaks down the grain rot best upgrades by category, explains how healing works, and shows you exactly how to decorate for maximum efficiency.
Understanding Stat Upgrades in GRAIN ROT
Your character's raw capabilities improve through stat upgrades purchased with salvage at the Outpost. These aren't cosmetic tweaks — they fundamentally alter how many risks you can take during extraction runs. The Grinder converts raw debris into usable gold, and that gold fuels your character progression. According to community data from the official Discord, the developers have tuned these costs across multiple playtests, so the current values reflect extensive player feedback.
Core Stat Breakdown
Each stat serves a distinct purpose, and understanding the grain rot stat upgrades hierarchy prevents wasted salvage. Here's what every stat actually does based on community testing: Each stat feeds a different part of the run loop, so knowing which one to prioritize next saves you from wasting salvage on upgrades that cannot help your current stage.
| Stat | Effect | Priority | Cost Trend |
|---|---|---|---|
| Health | Increases max HP before downed | High | Moderate |
| Stamina | Extends sprint and melee endurance | High | Moderate |
| Carry Capacity | More loot per extraction | Medium | Expensive |
| Extraction Speed | Faster escape sequence | Medium | Cheap |
| Corruption Resist | Delays Corrupted aggro range | Low | Expensive |
Health should be your first investment because it directly counters the most common death cause: getting swarmed while looting. Stamina follows closely, since sprinting away from danger is your primary defensive tool. Carry Capacity pays dividends over time, but its high cost means you should wait until you consistently extract successfully.
Upgrade Cost Scaling
The Grinder converts debris into gold, and upgrade prices scale with each purchase. Community reports indicate the first tier costs around 500 gold, with each subsequent tier increasing by roughly 40%. This exponential curve means you can't max everything — you must specialize based on your playstyle.
Solo players benefit most from Health and Stamina because they lack backup. Co-op squads should diversify, with one member prioritizing Carry Capacity to haul group loot while others focus on combat stats. This division of labor maximizes extraction value per run.
The Essential Furniture Guide
Furniture isn't decoration — it's functional infrastructure. The grain rot furniture guide reveals that every piece you place in the Outpost provides passive bonuses or unlocks new capabilities. Ripping furniture from ruins and hauling it back is the core loop, and knowing what to prioritize transforms your efficiency.
Ranking Furniture by Utility
| Tier | Furniture | Bonus | Acquisition |
|---|---|---|---|
| S | Med Station | Passive healing over time | Rare drop from medical facilities |
| S | Ammo Bench | Craft ammo between runs | Found in military zones |
| A | Salvage Rack | +15% debris value | Common in industrial areas |
| A | Bed | Faster respawn after down | Common household item |
| B | Storage Crate | Extra stash space | Very common |
| B | Stove | Cooked food buffs | Common in kitchens |
The Med Station is universally considered the grain rot best upgrade for furniture because it solves the healing problem passively. Instead of relying on consumables, you regenerate health while in the Outpost between runs. This saves gold and ensures you enter every extraction at full strength.
Furniture Placement Strategy
Where you place furniture matters as much as what you place. The Outpost layout affects walk speed and access efficiency. Keep high-traffic furniture like the Salvage Rack and Grinder near the extraction entrance to minimize backtracking. Place the Med Station centrally so you pass it naturally while managing inventory.
Storage Crate placement near the exit lets you dump loot quickly before heading back out. Community testing suggests a U-shaped layout with crafting stations along one wall and storage along the opposite side creates the smoothest workflow. Keeping your workflow compact also reduces the time you spend idle between runs, which compounds into dozens of extra extraction minutes over a full session.
How to Heal Effectively
Healing in GRAIN ROT operates on multiple layers, and understanding the grain rot how to heal mechanics keeps you alive through extended sessions. The game doesn't hand you health potions — you must build your recovery infrastructure. The layered system combines passive Outpost regeneration, consumables, and survivor-based healing, so the best approach depends on how much downtime you can afford.
Healing Methods Ranked
| Method | Speed | Cost | Reliability |
|---|---|---|---|
| Med Station | Slow (passive) | One-time furniture | Always available |
| Bandages | Fast | Consumable gold | Requires inventory space |
| Cooked Food | Medium | Ingredients + Stove | Buffs stack |
| Sleep at Bed | Instant | Time only | Resets position |
Bandages are the emergency option, healing a flat amount instantly. They're cheap but limited by inventory space. Cooked food from the Stove provides both healing and temporary buffs, making it the best value for co-op squads preparing for difficult runs.
The Med Station remains the long-term solution because it eliminates consumable dependency. According to community reports, the Med Station heals roughly 2 HP per second while you're in the Outpost, which fully restores most characters within a minute. While the initial cost is steep, the station pays for itself after roughly ten runs because you stop buying med kits and bandages from the merchants.
Healing During Extraction
Healing mid-run is riskier but sometimes necessary. Bandages require a 3-second channel that leaves you vulnerable. Cooked food can be eaten while moving, making it superior for escape scenarios. Always carry at least one cooked meal as an emergency heal that doesn't stop your sprint.
Decoration Guide: Form Meets Function
The grain rot decoration guide goes beyond aesthetics — decorations provide passive bonuses that stack with furniture effects. The grain rot how to decorate question has a strategic answer: every decorative piece should serve a mechanical purpose. For example, wall-mounted trophies can raise survivor happiness while floor rugs reduce noise, and combining both types creates a measurable quality-of-life bonus.
Decoration Types and Bonuses
| Decoration | Bonus | Source |
|---|---|---|
| Wall Posters | +2% extraction speed each | Common in residential areas |
| Plants | +1% Corruption Resist each | Rare greenhouse finds |
| Rugs | +1% stamina regen each | Common household |
| Lighting Fixtures | +3% visibility range | Industrial zones |
| Statues | +5% salvage value | Rare, high-risk areas |
Wall Posters are the efficiency king because extraction speed stacks multiplicatively. Collecting five posters gives you 10% faster extractions, which compounds over dozens of runs. Plants are rarer but valuable for players pushing into high-Corruption zones. Because the bonus multiplies with every extraction, the poster collection becomes one of the highest-value low-cost upgrades available in the mid game.
Decoration Layout Tips
Place decorations along your most-traveled paths to maximize passive uptime. Since bonuses apply globally regardless of position, the layout only matters for visual clarity — but a cluttered Outpost makes inventory management harder. Keep decorations along walls and corners to preserve clear walkways.
Lighting Fixtures deserve special mention because visibility range affects your ability to spot loot and threats during runs. The bonus applies globally, making it one of the best grain rot best upgrades for new players who struggle with dark environments.
Biggie and Murch: Your Outpost Merchants
Biggie and Murch are the two merchants who anchor the Outpost economy. Understanding their roles and stock rotation is essential for spending your salvage wisely. Learning their buy and sell patterns lets you time big purchases, such as vessel upgrades, for the days when the relevant stock appears in rotation.
Merchant Comparison
| Merchant | Sells | Currency | Restock |
|---|---|---|---|
| Biggie | Furniture, decorations | Gold | Every run |
| Murch | Consumables, gear mods | Gold + rare materials | Every 3 runs |
Biggie is your furniture source when you can't find specific pieces in the ruins. His stock rotates each run, so check him before every extraction to grab high-tier pieces like the Med Station if you haven't found one yet. Murch deals in consumables and gear modifications, but his premium items require rare materials found only in deep ruins.
Merchant Priority Spending
Biggie should receive the bulk of your early gold because furniture provides permanent, compounding benefits. Murch becomes more valuable late-game when you need specific gear mods to push into harder zones. According to the GRAIN ROT official Discord, the developers have confirmed Murch's stock will expand with future content updates, so establishing a relationship early pays off.
For players focused on long-term wealth, understanding the late-game money strategies helps you decide when to buy from merchants versus saving for stat upgrades. Merchant purchases often look attractive because they remove RNG from loot acquisition, but the gold-to-stat ratio rarely beats direct upgrade paths.
Optimizing Your Upgrade Order
The grain rot best upgrades order depends on your current progression stage. Early game, mid game, and late game each demand different priorities. The milestone-based priorities later in this section give you a simple rule of thumb for each phase so you never have to guess at the upgrade menu.
Early Game Priority (Runs 1-10)
-
Health to level 3 (survivability)
-
Stamina to level 2 (escape capability)
-
Med Station furniture (passive healing)
-
Salvage Rack (economy boost)
This phase focuses on survival fundamentals. You're still learning extraction routes and enemy patterns, so raw survivability prevents frustrating death loops. Investing in health, stamina, and basic crafting early prevents the frustrating cycle of dying before you accumulate enough salvage to progress.
Mid Game Priority (Runs 11-30)
-
Carry Capacity to level 3 (profit scaling)
-
Extraction Speed to level 2 (faster escapes)
-
Storage Crate furniture (inventory management)
-
Wall Posters decorations (compounding speed)
With survival basics covered, you shift toward profit optimization. Carry Capacity directly increases per-run income, while Extraction Speed reduces the most dangerous window. Once your survival baseline is secure, every gold piece should go toward stats that shorten runs or raise the value of each extraction you complete.
Late Game Priority (Runs 30+)
-
Corruption Resist to max (deep zone access)
-
Ammo Bench furniture (resource independence)
-
Statues decorations (salvage value)
-
Murch premium gear mods
Late game is about accessing the highest-value zones. Corruption Resist lets you operate in areas that would overwhelm unprepared players, and the Ammo Bench removes crafting dependency. For a complete breakdown of early priorities, check our what to upgrade first guide, and for broader base-building strategy, the Outpost guide covers layout optimization in detail.
Frequently Asked Questions
What is the single best upgrade in GRAIN ROT?
The Med Station furniture is the best single upgrade because it provides passive healing that eliminates consumable dependency. While stat upgrades improve your capabilities, the Med Station fundamentally changes your economy by removing recurring healing costs. Every player should prioritize finding or buying this furniture piece as early as possible.
How do I heal during an extraction run?
Carry bandages for emergency healing and cooked food for mobile recovery. Bandages require a 3-second stationary channel, while cooked food can be eaten while moving. The Med Station only works in the Outpost, so always enter runs with at least one consumable heal for emergencies.
What should I buy from Biggie and Murch?
From Biggie, prioritize furniture you haven't found in ruins, especially Med Station and Salvage Rack. From Murch, buy consumables early and gear mods late. Save rare materials for Murch's premium items rather than selling them, since they're required for the best late-game modifications.
How does the decoration system work?
Decorations provide passive percentage bonuses that stack globally. Wall Posters boost extraction speed, Plants grant Corruption Resist, and Statues increase salvage value. Collecting multiple of the same type compounds the bonus, making decoration gathering a legitimate progression strategy alongside furniture and stat upgrades.
Can I respec my stat upgrades?
No, stat upgrades are permanent in GRAIN ROT’s launch build. That’s why grain rot best upgrades demand early commitment—prioritize stamina or salvage yield before deep Corrupted runs. No respec exists yet, so lock in a build that matches your extraction style from run one.